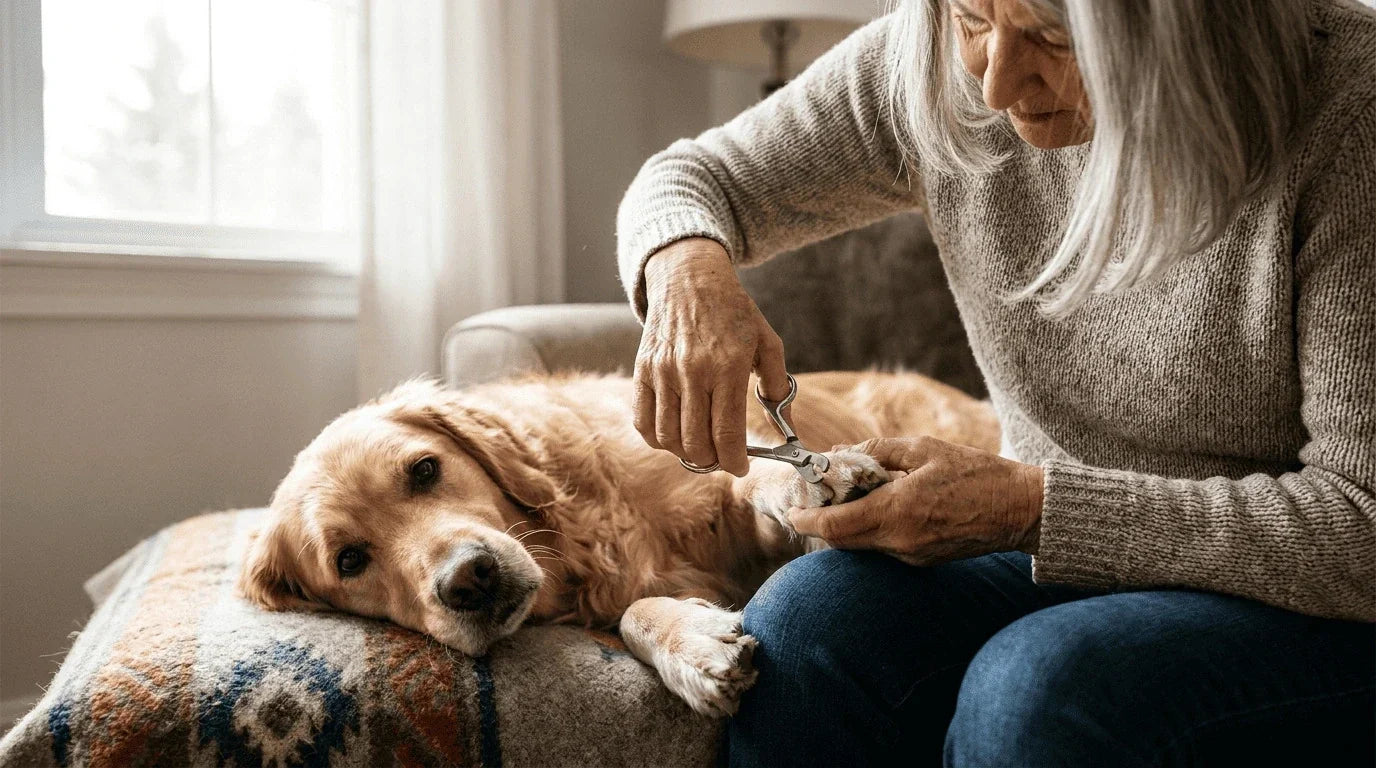
Most dogs' nails are too long. Most owners don't know it.
In my Minneapolis practice, I see the consequences of overgrown nails daily: dogs with altered gait, chronic joint stress, secondary orthopedic problems, torn nails, damaged nail beds, and paws that hurt without any obvious injury.
The frustrating truth is that nail overgrowth is one of the most preventable problems in dog care and one of the most commonly ignored.
Here's what most owners don't realize: nail length isn't cosmetic. It's biomechanical. When nails touch the ground during normal standing, they push toes upward, altering how weight distributes across the paw. Over months and years, this altered mechanics stresses joints, tendons, and ligaments in ways that eventually manifest as arthritis, pain, and mobility issues.
The audible click on hardwood floors isn't just annoying. It's a warning sign.
In this guide, I'll walk you through what proper nail length actually looks like, how to trim safely (avoiding the quick that most owners fear), the warning signs that need veterinary attention, and why breed and lifestyle matter for nail care.
If your dog resists nail trimming, or if you're uncertain whether their nails are the right length, this guide is for you. Nail care done correctly takes minutes per session and prevents years of downstream problems.
Why Nail Length Matters More Than Most Owners Realize
Let's start with the biomechanics because this is where the real damage happens.
A dog's paw anatomy is designed around specific nail positioning. When nails are the correct length, they don't touch the ground during normal standing—they only contact surfaces during traction moments (pushing off, digging, climbing). The pads bear the weight. The nails provide grip when needed.
When nails are overgrown, they touch the ground constantly. This creates a cascade of problems:
1. Altered weight distribution
Overgrown nails push toes upward at the tip, transferring weight from pads (designed for weight-bearing) to nail beds and joint structures (not designed for constant load).
2. Compensatory gait changes
Dogs unconsciously shift their weight and stride to reduce nail-ground contact. This creates asymmetric stress patterns on shoulders, elbows, hips, and spine.
3. Chronic joint stress
Sustained altered mechanics leads to inflammation, cartilage wear, and eventually arthritis, often years before it would develop naturally.
4. Reduced traction
Overgrown nails prevent pads from properly contacting surfaces, actually reducing traction on smooth floors despite the nails themselves being longer.
5. Increased injury risk
Long nails snag more easily, tear more dramatically, and put nail beds under constant stress that leads to infections and other complications.
6. Chronic mild pain
Constant pressure on nail beds creates chronic low-grade discomfort that dogs learn to live with, but that affects quality of life significantly.
The dogs who limp mysteriously, become reluctant to jump or climb stairs, or develop early arthritis often have contributing nail length problems that owners never suspected.
Related: Why your dog might be limping without obvious injury
What Proper Nail Length Actually Looks Like
Here's the simple test: When your dog stands normally on a flat, hard surface, can you slide a piece of paper between the nail tip and the floor?
- Yes, easily → Nail length is appropriate
- Barely → Nails are getting long, trim soon
- No, nails touch the floor → Too long, needs trimming now
- Nails push toes upward when standing → Significantly overgrown, address urgently
More detailed markers of appropriate length:
✓ No audible clicking on hardwood floors during normal walking
✓ Nails don't extend beyond pad when viewed from the side while dog stands
✓ No visible curving of the nail (severely overgrown nails curl into a "J" shape)
✓ Toes appear flat on the ground, not tilted upward
✓ Normal paw appearance overgrown nails often make paws look "splayed"
Some dogs need more frequent trimming than others.
Every 2-3 weeks: Dogs who spend most time on soft surfaces (grass, carpet, indoor floors), older dogs with slower nail wear, dogs with genetic tendency for fast growth, dogs with restricted mobility.
Every 3-4 weeks: Average active dogs with mixed surface exposure.
Every 4-6 weeks: Highly active dogs who regularly walk on pavement/concrete, dogs who dig or scratch abrasive surfaces frequently.
Weekly checks recommended for all dogs. The variability in growth rate makes fixed schedules unreliable.
Understanding the Quick: What It Is and Why It Matters
The quick is the living tissue inside the nail, blood vessels and nerves that supply the growing nail structure.
In light-colored nails, you can see the quick as a pink area inside the nail. The nail extends past the quick as clear/white material.
In dark-colored nails, the quick is hidden. This is why most owners fear trimming dark nails—cutting the quick causes bleeding, pain, and creates negative associations with future trims.
The quick recedes gradually with regular trimming. Dogs whose nails have been long for months have long quicks that make dramatic shortening impossible in a single session. The solution is gradual, frequent trimming that allows the quick to recede over weeks.
Signs you're getting close to the quick:
- Nail cross-section becomes darker or wetter looking
- Small dark circle appears in the center of the cut nail
- Dog reacts (though many dogs tolerate close cuts if trained gradually)
If you cut the quick: apply styptic powder (or cornstarch/flour in emergencies) with pressure until bleeding stops. Comfort your dog. Take a break, then continue trimming other nails if possible. Don't panic—it heals quickly.
Prevention is better than treatment. With dark nails specifically, take multiple small cuts rather than one large cut. Stop when you see the darker circle appearing in the center.
How to Trim Dog Nails Safely: Step by Step
The technique matters. Rushed, forceful trimming creates fear that makes future sessions harder.
What you'll need:
- Sharp guillotine or scissor-style nail clippers (dull tools crush nails causing pain)
- Grinder tool (optional, for smoothing/rounding after clipping)
- Styptic powder (for accidental quick cuts)
- Treats (positive reinforcement)
- Good lighting (essential for seeing the quick)
Choosing clippers:
Guillotine-style: Simpler design, good for small-to-medium dogs. Blade must be sharp—dull blades crush nails.
Scissor-style: Better leverage for larger dogs, more precise control. Look for stainless steel with rubber grips.
Grinder (Dremel-style): Grinds nails down gradually. Better for dogs with dark nails (allows careful approach). Requires acclimatization to sound and vibration.
Choose based on dog size and your comfort. Whichever you use, keep it sharp/functional.
Step 1: Position and Preparation
Start with a calm dog. Never trim when dog is anxious, overstimulated, or immediately after exercise.
Ideal positioning:
- Small dogs: In your lap or on a raised surface
- Medium dogs: Sitting or lying on their side
- Large dogs: Standing or lying (whatever they prefer)
Get comfortable yourself. Awkward positioning leads to imprecise cuts.
Have treats ready. Reward calm behavior throughout, not just at the end.
Step 2: The Approach for Dark Nails
Dark nails require patience. Take multiple small cuts instead of one large cut.
- Look at the nail underside—the quick often appears as a slight bump
- Take a small slice—1-2mm at a time
-
Examine the cross-section—if you see:
- White/clear tissue → safe to continue
- Slightly darker circle appearing → getting close, stop
- Wet/pink center → very close, stop immediately
- Continue in small increments until you approach the safe stopping point
For dogs with severely overgrown dark nails: Don't try to achieve ideal length in one session. Trim conservatively, then wait 1-2 weeks and trim again. The quick recedes with each trim.
Step 3: The Approach for Light Nails
Light nails are easier because the quick is visible.
- Identify the pink area (the quick) inside the nail
- Cut 2-3mm beyond the visible quick
- Angle the cut to match the natural nail shape (approximately 45 degrees)
- Smooth rough edges with a grinder or file
Consistent cutting angle creates smooth, comfortable nail tips.
Step 4: Trim All Nails Including Dew Claws
Don't forget dew claws. These nails on the inside of the leg (like a thumb) don't wear naturally and often overgrow dramatically.
- Check dew claws on both front legs (all dogs have them)
- Check rear dew claws (some breeds have them, many are removed at birth)
- Some dogs have double dew claws (Great Pyrenees, others)—trim all of them
Overgrown dew claws can curve into the leg, causing painful injuries.
Step 5: Smooth and Reward
After trimming, use a grinder or file to smooth rough edges. This prevents:
- Snagging on fabric or surfaces
- Scratching your legs
- Uneven wear patterns
End every session positively. Treats, praise, brief play. Nail trimming should be a neutral-to-positive experience.
Making Nail Trimming Tolerable (Even Enjoyable)
Dogs who resist nail trimming usually learned to fear it through bad early experiences.
Reconditioning takes time but works:
Week 1-2: Simply handle paws daily during calm moments. Touch each nail. Reward. No trimming.
Week 3-4: Introduce clippers as objects. Let dog sniff. Touch clippers to nails without cutting. Reward heavily.
Week 5-6: Trim one nail per session. Multiple sessions per week if needed. Always end positively.
Week 7+: Gradual expansion to full sessions.
Never force a fearful dog. Forcing creates permanent trauma. Working with a positive reinforcement trainer or veterinary behaviorist is worth the investment for severely fearful dogs.
Alternative options for resistant dogs:
- Professional groomer with dog handling experience
- Veterinarian (especially if sedation is needed)
- Muzzle training (protects everyone during unavoidable trims)
- Cooperative care training (teaches dog to voluntarily present paws)
Fighting your dog every 3-4 weeks damages your relationship and their trust. Investment in proper conditioning is worth the effort.
Warning Signs That Need Veterinary Attention
Some nail issues aren't just cosmetic, they need medical evaluation.
🚨 Torn or split nails with bleeding
🚨 Nail bed infections (redness, swelling, discharge, warmth)
🚨 Nails growing into pads (severely overgrown)
🚨 Sudden refusal to bear weight after nail incident
🚨 Changes in nail color or texture (thickening, softness, color changes)
🚨 Loose or missing nails without obvious trauma
🚨 Multiple simultaneous nail problems (may indicate autoimmune or systemic disease)
🚨 Symmetrical Lupoid Onychodystrophy signs (multiple nails loosening/falling off symmetrically—autoimmune condition)
🚨 Persistent nail-focused licking or attention
🚨 Nail bed odor suggesting yeast or bacterial infection
Some conditions require prescription treatment (immunosuppressants for autoimmune diseases, antibiotics for infections, surgical intervention for severe overgrowth).
Don't attempt to trim severely overgrown nails at home—the quick may extend beyond safe cutting range, and professional trimming may require sedation to achieve safely.
Breed-Specific Nail Considerations
Different breeds have different nail challenges:
🐕 Small breeds (Chihuahua, Yorkie, Pomeranian):
- Fast growth relative to wear
- Higher trimming frequency needed
- Delicate nails require sharp precise clippers
- Often reluctant to nail handling
🐕 Large breeds (Labrador, German Shepherd, Golden):
- Thicker nails require more force
- Scissor-style clippers usually better
- Often more tolerant of trimming
- May need multi-person handling for resistant dogs
🐕 Giant breeds (Great Dane, Mastiff, Newfoundland):
- Extremely thick nails
- Professional trimming often more practical
- Dew claw dew claws worth attention
- Grinder tools may be more effective than clippers
🐕 Northern breeds (Husky, Malamute, Samoyed):
- Naturally tough nails
- Often good self-wearing on rough surfaces
- Watch for zinc deficiency signs
- Coat between toes needs regular trimming
🐕 Small terriers and working dogs:
- Often diggers with faster natural wear
- May need less trimming than other breeds
- Watch nail beds for injury from digging
🐕 Senior dogs (any breed):
- Slower wear due to reduced activity
- Often more sensitive to handling
- May have thickened/brittle nails
- Regular professional trimming often best
Related: Senior dog paw care changes after age 7
Common Nail Care Mistakes
Even well-intentioned owners make preventable mistakes:
❌ Waiting too long between trims
Every 3-4 weeks is standard, not "when they look long." By the time nails look long, quicks have extended.
❌ Trying to shorten dramatically in one session
Take small cuts. Multiple sessions over weeks. Quicks need time to recede.
❌ Using dull clippers
Crushed nails hurt more than sharp cuts. Replace clippers every 1-2 years or when they lose sharpness.
❌ Ignoring dew claws
They don't wear naturally. They overgrow more than other nails.
❌ Forcing fearful dogs
Creates permanent fear. Take time to condition properly.
❌ Only trimming, never grinding
Rough nail edges snag and scratch. Grinding creates smoother, more comfortable nails.
❌ Cutting too aggressive on dark nails
Take multiple small cuts. Look for the changing cross-section indicator.
❌ Trimming when dog is stressed or overtired
Nail trimming requires calm cooperation. Choose optimal timing.
Nail Care for Special Circumstances
Some dogs have unique nail care needs:
Dogs with orthopedic issues:
- Nail length affects gait dramatically
- Proper trimming may reduce compensatory pain
- Coordinate with veterinary rehabilitation
Dogs with allergies:
- Nail-focused licking may worsen allergic paw issues
- Address underlying allergies alongside nail care
Related: The complete allergic paw dermatitis protocol
Dogs with hyperkeratosis:
- May have nail hyperkeratosis as well as pad hyperkeratosis
- Thickened nails need modified trimming approach
- Regular filing/grinding may be more appropriate than clipping
Related: Complete hyperkeratosis treatment protocol
Working and sporting dogs:
- Regular trail work may adequately wear nails
- Monitor for injuries from rough terrain
- May need less frequent trimming but more inspection
Related: Complete hiking paw protection guide
Diabetic dogs:
- Slower healing means small cuts matter more
- Careful trimming to avoid any bleeding
- Regular veterinary monitoring important
The Long-Term Perspective on Nail Care
Consistent nail care throughout your dog's life prevents cumulative problems.
Puppies: Start handling paws and introducing clippers from 8 weeks. Positive early experiences prevent lifelong trimming fears.
Adult dogs (1-7 years): Establish routine of every 3-4 week trimming. Weekly inspection. Address any changes promptly.
Senior dogs (7+ years): Increase attention as activity decreases. May need more frequent professional trimming. Monitor for chronic conditions affecting nail health.
The dogs who reach their senior years with healthy paws are those whose owners maintained consistent nail care throughout life.
The dogs who develop mobility issues, chronic pain, and reduced quality of life often have contributing factors from years of nail neglect factors that were preventable with simple regular care.
Nail care isn't dramatic. It doesn't feel urgent. But it's one of the most consequential paw care habits you can establish.
Your dog's nails don't ask for attention until they become a problem. By then, downstream damage has already begun.
Regular nail care, done properly and consistently, prevents years of cumulative issues.
Every 3-4 weeks. A few minutes per session. Decades of healthier paws.
Start this week. Your dog's future self will benefit.